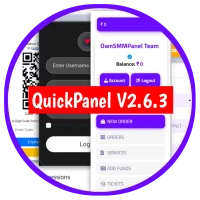
How to Create Your Own SMM Panel Website with QuickPanel V2.6.1
If you're interested in creating your own Social Media Marketing (SMM) panel website, you're in luck. QuickPanel V2.6.1 is a powerful and user-friendly script that makes this process straightforward. This guide will walk you through the steps to set up your SMM panel using QuickPanel V2.6.1.
1. Download and Install QuickPanel V2.6.1
To get started, you need to download the QuickPanel V2.6.1 script. You can find the download link here.
Installation Steps:
- Download QuickPanel V2.6.1: Visit this link to download the script.
- Upload the Script: Use FTP or your hosting control panel to upload the QuickPanel files to your server.
- Create a Database: Access your hosting control panel, create a new MySQL database, and make a note of the database credentials.
- Run the Installation: Navigate to the installation URL of your QuickPanel script, follow the on-screen instructions, and enter your database details when prompted.
2. Configure Your SMM Panel
After installing QuickPanel, you need to configure your SMM panel:
- Create Admin Accounts: Set up admin accounts with appropriate permissions through the admin panel.
- Customize Settings: Adjust the settings to align with your branding, including logo, colors, and site name.
- Add Services: Input the services you plan to offer, such as social media likes, followers, and views. Set the pricing for each service.
3. Integrate Payment Gateways
Payment gateways are crucial for handling transactions on your SMM panel. QuickPanel supports various payment methods:
- Select Payment Methods: Choose which payment gateways you want to integrate (e.g., PayPal, Stripe).
- Configure Settings: Enter your payment gateway details in the admin panel settings.
- Test Payments: Perform test transactions to ensure that payments are processed correctly.
4. Enhance Security
Securing your SMM panel is essential to protect user data and transactions:
- Install an SSL Certificate: Enable HTTPS on your site to secure data transmissions.
- Use Google reCAPTCHA: Integrate reCAPTCHA to prevent spam and unauthorized access.
- Implement Secure Password Hashing: Use strong hashing algorithms to protect user passwords.
5. Optimize for SEO and User Experience
To attract and retain users, optimize your SMM panel:
- SEO Best Practices: Optimize meta tags, descriptions, and keywords to improve search engine rankings.
- Improve User Experience: Design a user-friendly interface and ensure the ordering process is intuitive.
6. Promote Your SMM Panel
Once your panel is live, it's time to promote it:
- Social Media: Use social media platforms to market your panel and attract potential customers.
- Content Marketing: Publish relevant content to drive traffic and engage your audience.
- Affiliate Programs: Set up an affiliate program to expand your reach through partners.
Conclusion
Creating your own SMM panel website with QuickPanel V2.6.1 is a practical and effective way to offer social media marketing services. By following these steps, you'll have a fully functional SMM panel that meets your needs. Keep your panel updated and continuously seek ways to improve and expand your services.
If you have any questions or need further assistance, don't hesitate to reach out!
